Mastering Professional Acrylic Nail Adhesion and Retention
Professional nail adhesion depends on thorough mechanical and chemical preparation of the natural plate to prevent product lifting. This standard involves removing surface oils, pushed-back cuticles, and residual debris before applying primers. Mastering these techniques ensures durable acrylic enhancements that maintain structural integrity until the client’s next scheduled maintenance appointment.
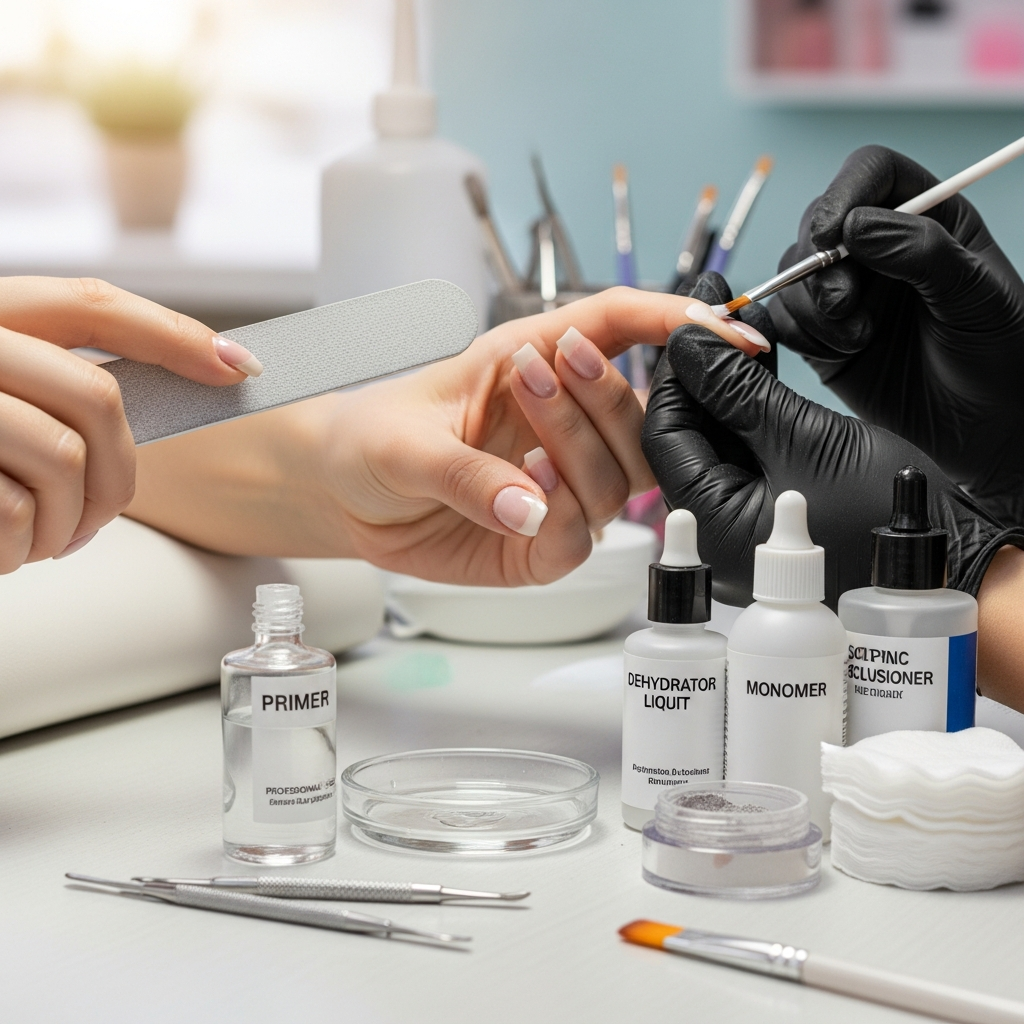
Critical Mechanical Preparation for Product Longevity
The foundation of any durable nail service begins with the removal of the true cuticle. Use a professional pusher to clear non-living tissue from the plate surface.
A 180-grit file should be used to gently remove the natural shine from the nail. This creates the necessary surface area for the acrylic polymer to bond securely.
Excessive filing can thin the natural plate and weaken the bond. Always file in the direction of nail growth to maintain the health of the underlying keratin.
Chemical Dehydration and Priming Standards
After mechanical prep, a professional nail dehydrator is essential to remove moisture and oils. This temporary dehydration lasts approximately twenty minutes during the application.
Applying a high-quality primer creates a chemical bridge between the natural nail and the acrylic. Use acid-free primers for sensitive clients to prevent chemical burns.
Ensure the primer does not touch the surrounding skin or eponychium. Contamination of the soft tissue often leads to localized irritation and future product lifting.
Optimizing the Liquid-to-Powder Ratio
Achieving the correct bead consistency is vital for nail structural integrity. A bead that is too wet will shrink and pull away from the sidewalls.
Conversely, a bead that is too dry will not fully polymerize. This leads to brittle enhancements that chip or crack under minor daily stress.
The ideal bead should look like a frosted pearl and move slowly. This consistency allows the nail technician time to sculpt without the product running.
Strategic Apex Placement and Structural Balance
The apex provides the necessary strength to the nail enhancement. It must be positioned over the stress area to absorb impact and prevent breaks.
A properly placed apex transitions smoothly into a thin free edge and cuticle area. This balance ensures the nail looks natural while remaining functionally durable.
Avoid bulk at the sidewalls and proximal nail fold. Thinner edges prevent the product from catching on hair or clothing, which reduces the risk of lifting.
Preventing Common Technical Lifting Issues
- Never apply acrylic onto the skin or cuticle area.
- Ensure the brush is clean of old debris before dipping into monomer.
- Maintain a consistent room temperature to control polymerization speed.
- Check the natural nail for signs of damage or thinning before application.
Professional Safety and Client Protection
Sanitizing the client’s hands and your own tools is a mandatory safety step. This prevents the trapping of pathogens under the acrylic material.
Proper ventilation in the salon protects both the technician and the client. Managing dust and vapors is a core requirement of professional nail service standards.